
How to Remove Background from Image: A Complete Guide
Whether you need a clean headshot for your LinkedIn profile, a transparent product image for your online store, or a cutout for a creative collage — removing a background is simpler than you think. Here is everything you need to know.
The need to remove background from image is one of the most common editing tasks in the digital world. A social media manager preparing profile photos for a company directory. A student creating a presentation slide and wanting the company logo to float cleanly on a coloured slide. A small business owner shooting product photos with a smartphone and needing a white background for an Amazon listing. A hobbyist designer assembling a mood board or a photo collage.
In each of these scenarios, the goal is the same: isolate the subject from its original surroundings so that it can be placed anywhere — a new background, a document, a website, or a social media post — without the distraction of the original scene. And in each case, the person doing the editing does not want to spend hours learning complex software or mastering the pen tool.
The good news is that modern AI-powered tools have made this process accessible to everyone, regardless of technical skill. What used to require a design degree or hours of practice in Photoshop can now be done in a few clicks directly in your browser. This guide covers everything from the evolution of background removal techniques to a practical step-by-step workflow that will have you creating professional-looking cutouts in seconds. By the end, you will know exactly how tomake image background transparent and what to do with the result once you have it.
The Evolution of Background Removal: From Pen Tools to One-Click AI
To appreciate how far the technology has come, it helps to understand what background removal used to look like. Before AI, the standard approach in professional design software involved manually tracing the outline of the subject. The pen tool in Photoshop allowed designers to create vector paths by placing anchor points one at a time along the subject's edge. A skilled operator could trace a simple object in a few minutes, but a complex shape — a person with curly hair, a furry pet, or a product with fine details — could take 20, 30, or even 60 minutes of painstaking point placement.
Alternative manual tools like the magnetic lasso, the quick selection tool, and the magic wand offered faster results on simple images but struggled with the same edge cases: fine hair, semi-transparent objects like glass, and subjects with soft or blurred edges. Every manual method shared a fundamental limitation — a human had to decide, pixel by pixel, what belonged to the subject and what belonged to the background. This was not only slow but also inconsistent: the same image processed by two different designers would produce two different results.
Modern AI-powered tools completely bypass these limitations. Instead of asking a human to trace edges, they use computer vision models trained on millions of labelled images. When you upload a photo to an online transparent cutout tool, the AI analyses every pixel, predicts which ones belong to the subject versus the background, and generates a precise alpha mask — all in under a second. The result is a cutout that handles flyaway hair, reflective surfaces, and complex lighting with a level of accuracy that matches or exceeds what an experienced designer could achieve manually. And it does this without the designer needing to touch a single tool.
Step-by-Step Practical Blueprint
1. Start with a high-quality source image
The quality of your output depends heavily on the quality of your input. For the best results, choose an image where the subject is in sharp focus and clearly separated from the background. Good lighting helps — even, diffused light that does not cast harsh shadows across the subject makes the AI's job significantly easier. Avoid heavily compressed JPEGs with visible artefacts, as the compression noise can confuse the edge-detection model. Aim for a resolution of at least 800 x 800 pixels; higher resolutions give the AI more pixel data to work with, which translates to cleaner edges.
2. Upload to an automated cloud extractor
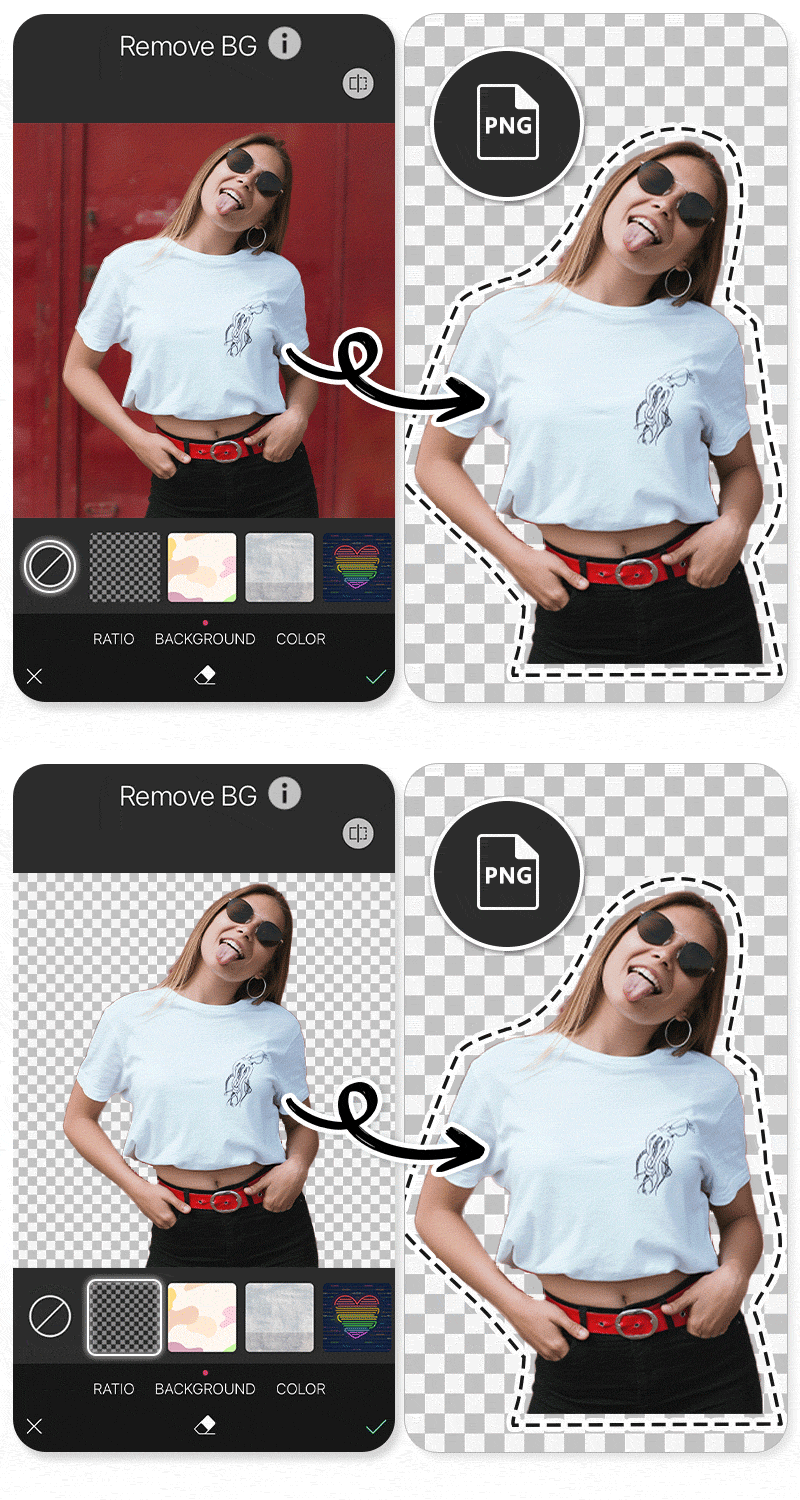
Open your browser and navigate to an AI-powered background removal tool like the one at RMBG.PRO. Drag and drop your image onto the upload area, or click to browse for the file. The process is the same whether you are on a desktop computer, a tablet, or a phone — the AI runs on remote servers, so your device does not need any special hardware. Within one to three seconds, depending on the image size, the tool displays a preview of the cutout with the background removed.
At this stage, the tool has already done the heavy lifting. The AI model has analysed every pixel, identified the subject, distinguished it from the background, and generated a transparent version of your image. What you see in the preview is a clear background from photo free result — no manual tracing, no masking, no complicated settings.
3. Review the micro-details
While the AI is remarkably accurate, it is always worth taking a moment to inspect the result closely. Zoom in on areas with fine detail: hair strands around the edges of a portrait, the rim of a glass where light creates a refractive highlight, or the negative spaces inside objects like the handles of a mug or the gaps in a chair back. Most modern tools let you refine the result by painting over areas the AI may have missed or by restoring parts of the subject it accidentally removed. If the cutout looks clean at 100-200 % zoom with no visible halo or missing chunks, you are ready for the final step.
4. Export as transparent PNG
The export stage is where the cutout becomes truly useful. Click the download button and select the PNG format. PNG preserves transparency, meaning the background of your image will be invisible when you place it on any coloured surface, document, or web page. Unlike JPEG, which fills empty areas with white, a PNG with transparency (sometimes called a "transparent PNG" or alpha-channel image) gives you complete layout flexibility. You can place the subject on a red background for a banner ad, a blue gradient for a presentation slide, or directly onto a website without any white box appearing around it.
Pro-Tips for Creative Background Customization
Once you have mastered the beginner photo editing workflow of removing a background, the real fun begins. A transparent subject is like a raw ingredient — versatile and ready to become part of something bigger. Here are three creative directions to explore:
Apply a solid brand colour
The simplest and most professional use of a transparent cutout is to place it on a solid colour background that matches your brand palette. If you run an e-commerce store, use your brand's primary colour as the backdrop for product shots to create a consistent, recognisable catalogue aesthetic. If you are preparing a presentation, place logos or product images on your company's signature colour for a polished, on-brand slide deck. Most tools let you choose a custom background colour directly from a colour picker, or you can use a hex code for precise brand matching.
Add realistic depth with drop shadows
A subject without a background looks clean but can sometimes appear flat, especially in product photography. Adding a subtle drop shadow restores a sense of depth and realism. The key is subtlety: a shadow that is too dark or too sharp looks artificial and distracts from the product. Aim for a soft shadow with low opacity (20-30 %) and a slight offset (3-5 pixels down and to the right). Some advanced tools include a built-in shadow generator that matches the direction and intensity of the original lighting, producing a result that looks like the subject was always meant to float above its new canvas.
Composite onto a completely new scene
The most creative option is to place your isolated subject onto an entirely different background image. A product shot taken in a home studio can be transported to a beach, a mountain landscape, or a modern living room. A portrait taken against a blank wall can be placed into a busy street scene or a professional office environment. The quality of the composite depends on matching the lighting direction and colour temperature between the subject and the new background — warm light on the subject with cool light in the background will look mismatched. When done well, however, compositing opens up creative possibilities that would be expensive or impossible to achieve with a physical photoshoot.
Quick Reference — Image Formats for Transparent Backgrounds
- PNG — Best for transparency. Supports full alpha channel. Larger file size but lossless quality.
- WebP — Modern format with transparency support. Smaller file size than PNG. Supported in all major browsers.
- SVG — For vector graphics only. Not suitable for photographs. Scales to any size without quality loss.
- JPEG — Does not support transparency. Avoid for cutouts unless you need a solid-colour background baked in.
Remove Backgrounds Instantly — No Skills Required
Our web tool gives you a clean, instant background isolation experience directly in your browser for free. No software to download, no account to create, no technical knowledge needed. Whether you need to clear background from photo free for a social media post, prepare a product image for your marketplace listing, or create a transparent cutout for a design project, the tool delivers studio-quality results in seconds. It is the perfect starting point for any creative project.
Free, browser-based, no signup required.
Free • No signup • AI-powered • Sub-second • Browser-based • PNG export