
How to Resize an Image Without Losing Quality
A smaller image does not have to be a blurry image. A larger image does not have to be pixelated, if you manage expectations. Here is what actually happens when you change pixel dimensions, which techniques preserve visual quality, and where the real limits lie.
Introduction
Image resizing changes the pixel dimensions of a file. Cropping, by contrast, removes parts of the image without changing the size of the pixels that stay. People often confuse the two, and that confusion is one of the fastest ways to end up with a blurry or stretched file on your website or shop.
Resizing can reduce perceived quality for two main reasons: you either throw away pixels (downscaling) in ways that muddy fine detail, or you ask the computer to invent pixels that were never captured (upscaling). The interpolation engine, the final dimensions, the number of resize passes, and the lossy compression you apply afterwards all matter.
Practical short answer: downscaling from a bigger original to a smaller target usually preserves excellent visual quality if the aspect ratio is locked and you export with sensible settings. Upscaling a small image is always harder; modern AI can improve the perceived detail but cannot recover information that was never in the original file.
What Happens When You Resize an Image?
Every bitmap image is a grid of small squares called pixels. Together they define the image width × height in pixels, the pixel dimensions. The ratio of width to height is the aspect ratio. Resolution describes how densely those pixels are printed or displayed; on the web, pixel dimensions are almost always more important than the PPI number written in the file metadata.
Downscaling reduces the pixel count. Going from 3000 × 2000 px to 1500 × 1000 px on a 3:2 picture is a 2× width/height reduction and a 4× reduction in total pixels. The resizer has to decide how to merge four old pixels into one new pixel while keeping lines and textures crisp.
Upscaling increases the pixel count. Going from 800 × 600 px to 2400 × 1800 px means roughly nine out of every ten pixels in the result did not exist in the source. The computer must interpolate plausible data for every new position. That is why reducing a large image is generally easier than enlarging a small one: inventing detail is harder than averaging it.
Can You Really Resize an Image Without Losing Quality?
The honest answer is partly yes, partly no. Resizing always changes the pixel data, so in a strict technical sense zero quality loss is only possible in very specific scenarios (for example, a perfectly lossless integer 2× downscale of a clean source into a lossless PNG exported without recompression). In everyday usage, the practical question is whether the viewer at the final display size will notice a difference.
- Downscaling can often preserve excellent visual quality. A high-megapixel photograph reduced to the exact rendered size of your website column can look identical to the naked eye.
- Upscaling cannot recreate all original information. You cannot bring back eyelashes, stitching or text hinting that the camera never captured.
- AI upscaling can improve perceived detail by hallucinating plausible textures. That is genuinely useful for product photos, print proofs, and slides — but it can also invent patterns, mangle small text, and introduce artifacts. Do not treat it as a magic guarantee.
- The original image quality matters. A noisy, compressed 720p source will still look noisy and compressed after resize; the operation does not make the source better.
- The final display size matters. An image that looks soft at 100 % zoom on a designer's monitor may look perfectly sharp on a 320 px mobile thumbnail.
- Lossy compression applied after resizing can add its own damage. A technically perfect resize can still look ruined if you then export a JPEG at quality 20.
Resize vs Crop vs Compress
These four operations are often lumped together under « optimize my image », but they change different things and should not be confused:
| Operation | What changes? | Main purpose |
|---|---|---|
| Resize | Pixel dimensions. | Make the image larger or smaller. |
| Crop | Visible area. | Remove unwanted areas, improve composition. |
| Compress | File size (bytes on disk). | Reduce storage and bandwidth usage. |
| Convert format | File encoding / container. | Change compatibility or efficiency (WebP, AVIF, PNG…). |
A common mistake is to compress an image to shrink the file and then wonder why it still looks huge on a page. If the page renders an 800 px-wide column and you upload a 5000 px-wide image, you waste bandwidth regardless of compression level. Resize first, then compress.
How to Resize an Image Without Losing Quality Online
RMBG.PRO publishes a real browser image resizer under File Tools. The UI uses two numeric inputs (Width px / Height px), a Lock/Unlock aspect ratio toggle, and a canvas preview. The names below match that implementation exactly:
- Choose the original, highest-quality image you have. Prefer the master source file to screenshots or already-compressed exports.
- Decide the exact required dimensions. Use the biggest size the layout will actually render at; do not upload 5000 px files for a 600 px column.
- Upload to a resizer. In the RMBG.PRO image resizer, click or drag a PNG / JPG / JPEG file (≤ 10 MB) into the dashed upload panel. The editor reads the original dimensions and pre-fills both width and height.
- Maintain the correct aspect ratio. Keep the Lock icon enabled unless you intentionally want to stretch. With the lock on, typing a new width computes the matching height and vice versa.
- Enter the target dimensions. 800 × 600 becomes 400 × 300 at 50 %, not 400 × 600. Use numbers. Do not guess.
- Resize to the target dimensions. The canvas redraws the preview live as you change the numbers.
- Choose an appropriate output format. Export PNG if you need lossless or transparency, JPEG for plain photography at quality 75–85, or WebP/AVIF if your pipeline supports them. For the RMBG.PRO resizer the default export preserves PNG encoding through the canvas pipeline.
- Use reasonable compression. Avoid extreme JPEG quality values. Quality 50 can save bytes, but quality 25 usually introduces visible blocking that outweighs the savings.
- Compare the result with the original at 100 %. Zoom to actual pixels; do not trust a shrunken preview.
- Download the resized image. The RMBG.PRO resizer downloads a file named
{name}_resized_{W}x{H}.{ext}.

How to Resize an Image for a Website
Serving oversized images is one of the most common avoidable performance problems on the web. A 5000 px hero uploaded « just in case » forces every visitor to download megabytes that the browser then discards during layout. Size images to the actual rendered dimensions at each breakpoint, or use responsive images so the browser can choose.
- Website hero images. Match the largest expected display width. For most modern templates that is roughly 1600–2400 px wide depending on layout; do not blindly upload 5000+ px files.
- Blog images. Resize to the content column width, typically 900–1400 px at desktop. Measure your theme.
- Thumbnails. Upload a dedicated small file; do not ask CSS to shrink a 3000 px catalog thumbnail.
- Product images. Standardize zoom, gallery, and thumb dimensions across your whole catalog.
- Social media images. Follow each platform's current recommended sizes; platforms change guidelines, so re-check when publishing.
- Profile/avatar images. Keep them small; 200–500 px on the longest side is usually enough.
- Background images. Balance file size and quality. A full-screen gradient does not need 8K pixels.
If your CMS or framework supports responsive images (srcset, sizes, <picture>), ship multiple sizes so phones and desktops can each fetch the right resolution. Format also matters — the WebP speed guide and the WordPress image optimization article cover both format and pipeline choices.
How to Resize Product Images Without Losing Quality
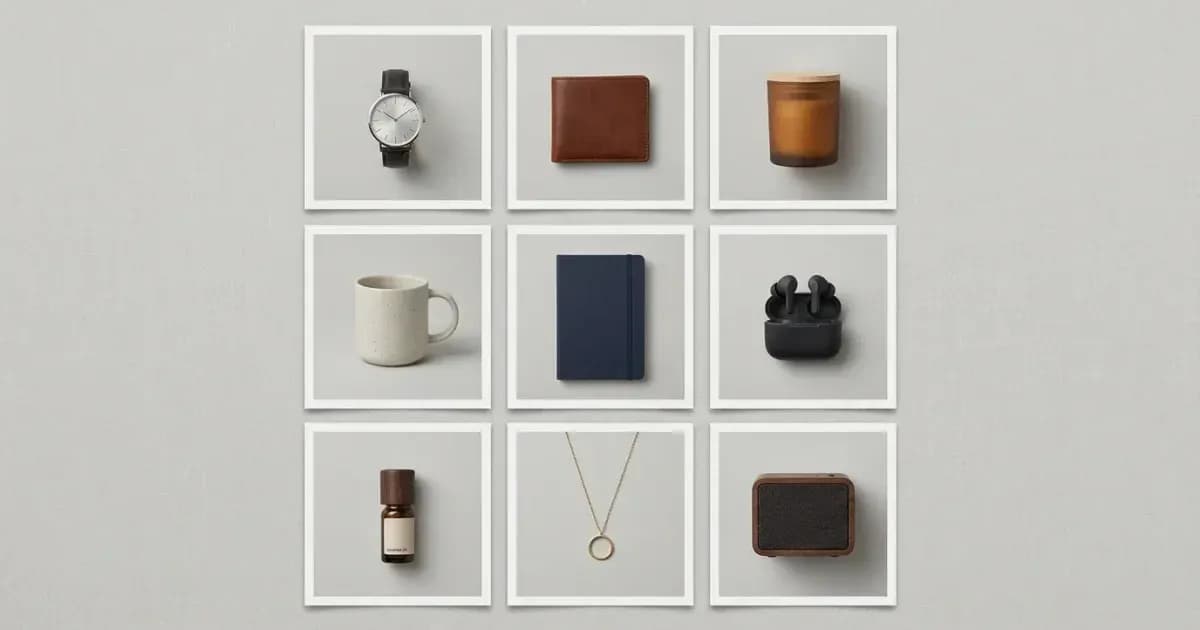
In e-commerce, consistent dimensions are a quality signal. A Shopify, WooCommerce, or Amazon catalog where each picture sits in a matching canvas looks professional; a page where each product is a random height feels broken.
- Use consistent dimensions. Pick one master canvas (for example 1500 × 1500 px square) and fit every product into it.
- Use consistent aspect ratios. 1:1 is the most common catalog ratio; 3:4 and 4:5 also work. Do not mix them inside a single grid.
- Control product framing. Leave the same breathing space around the subject each time so one SKU does not look huge next to another.
- Avoid excessive enlargement. A small studio crop enlarged 3× to fill your canvas will look soft. Re-shoot or upscale cautiously.
- Maintain product detail. Stitching, logos, labels, and textures are buying signals; aggressive JPEG compression after resize can erase them.
- Prepare the gallery sizes. Hero, medium, and thumbnails are separate files; resize once per variant.
- Respect each marketplace. Shopify, WooCommerce, Amazon, and marketplaces each publish image-size rules.
Background removal can happen before or after resize — usually first, because the bulk product image editing pipeline is often original → detach → frame → resize → watermark → upload. Watermarking after resize keeps the logo sized correctly on every asset, as the product watermark guide explains.
Best Image Dimensions for Common Uses
The table below describes the strategy, not a one-size pixel number. Exact sizes depend on your layout, theme, and platform — measure before uploading.
| Use case | Recommended approach |
|---|---|
| Website hero | Match the largest expected display size on your layout. |
| Blog image | Use the width of the article content column. |
| Product image | Keep one consistent canvas and ratio across products. |
| Thumbnail | Generate a dedicated small version; do not rely on CSS. |
| Social media | Re-check each platform's current recommended dimensions at publish time. |
| Keep both dimensions and file size reasonably small for inboxes and mobile. |
How to Resize Images Without Making Them Blurry
- Start with the original. Screenshots of screenshots, or JPEGs that have been re-saved ten times, degrade fast.
- Avoid repeatedly resizing the same file. Each lossy save pass adds artifacts. Resize once from the master.
- Avoid extreme upscaling. Going 2× can be okay; 8× usually looks synthetic unless the image is very simple.
- Preserve aspect ratio. Stretching a 4:3 photo into 16:9 looks terrible and is entirely avoidable.
- Use appropriate interpolation. Lanczos, bicubic, or modern model-based resizers beat nearest-neighbor for photographic content.
- Sharpen carefully after downscaling when the output looks slightly soft; a subtle unsharp mask or high-pass layer restores pop without adding halos.
- Export at appropriate quality. Quality 75–85 JPEG is a common default; go higher for product close-ups.
- Inspect the image at 100 % zoom. The preview pane lies.
Best Image Formats After Resizing

- JPEG — great default for photographs. Small files, excellent support, lossy. Avoid for sharp-edge graphics, screenshots with text, or images that need transparency.
- PNG — lossless compression, transparency, crisp text and UI screenshots. File sizes are typically larger than JPEG/WebP for photos.
- WebP — modern, widely supported, lossy and lossless, transparency included. Often a better default than JPEG or PNG after resize.
- AVIF — the most efficient mainstream format today for small delivery payloads. Encoding is slower than WebP; support is excellent in modern browsers. Precompute AVIF ahead of time rather than generating on every request.
For photography-first sites, a <picture> stack with AVIF + WebP + JPEG fallbacks, each at correctly-sized widths, is the gold standard. Resize first; convert second. Do not repeat the entire WebP article here — it covers format trade-offs in depth.
How to Resize Images in Photoshop
- Open the original image from File → Open so you work from the highest-quality layer.
- Open Image → Image Size. Make sure the chain-link icon is on.
- Enable proportional scaling if width and height are linked.
- Enter the target width or height in pixels. The other follows.
- Pick a Resample method. Preserve Details 2.0 or Bicubic Sharper for reduction, Bicubic Smoother for gentle enlargements in older workflows, or an AI enlargement plugin if you have one.
- Review the result at 100 %. Apply a subtle sharpening pass if the reduction softened textural detail.
- Export with File → Export → Export As or Save a Copy at the quality you plan to publish. Do not keep flattening and re-saving the same master repeatedly.
How to Resize Images on Mac, Windows, and Mobile
- macOS. Open the image in Preview → Tools → Adjust Size → enable « Scale proportionally » → enter width / height in pixels → Save.
- Windows. Open the file in Photos, click the three-dot menu → Resize → choose a preset or define custom dimensions then Save as. The classic Paint editor also supports Resize → Pixels → maintain aspect ratio.
- iPhone / iPad. Shortcuts.app has a built-in « Resize Image » action. Alternatively, Photos → Edit → Crop is for cropping; for pixel-level resize a Shortcut, a free image editor app, or a web tool is typically the cleanest path.
- Android. Gallery apps vary; many have a built-in resize/optimize entry in the share menu. Otherwise, use a reputable image editor app or upload to the web resizer.
If you already plan several image edits (background, watermark, size), doing them in one browser pipeline avoids re-encoding. The RMBG.PRO image resizer is one convenient last step.
Common Image Resizing Mistakes
- Enlarging tiny images too much. Upscale 2× in a pinch, not 10×.
- Ignoring aspect ratio. Broken proportions read as low quality faster than blurriness.
- Using screenshots instead of originals. They are compressed, re-scaled, and often cropped to the wrong canvas.
- Resizing the same file repeatedly. Export from master once per target size.
- Compressing too aggressively. Bytes saved are not worth a grainy product photo.
- Using the wrong format. A JPEG for a flat 8-color logo wastes bytes and introduces ringing; a PNG for a 6000 px photo wastes bytes.
- Uploading oversized images. CSS width: 100 % does not reduce download size.
- Confusing resolution metadata with file size.A 300 PPI tag on a 400 px-wide image does not make it sharper.
- Stretching images instead of preserving proportions. Pad with whitespace or crop before you stretch.
How to Check Image Quality After Resizing
- View at 100 % in an image viewer, not a shrunken preview.
- Zoom into important details: logos, labels, stitching, jewelry texture, type.
- Check edges for halos, ringing, or smeared lines — typical artifacts of interpolation + aggressive JPEG.
- Check text and overlays. Resizing often blurs on-image text beyond legibility before you notice on the subject.
- Check faces. People are exquisitely sensitive to unnatural skin texture and artificial detail introduced by AI upscalers.
- Check product details. If a button, zipper, or strap has turned into a muddy blob, the resize is too lossy for an e-commerce context.
- Compare before/after side by side. Flipping between the two reveals subtle softness you would otherwise miss.
- Check the final file size. An unexpectedly small PNG often means quantization or wrong export settings.
- Test the image in its actual destination. A 400 px thumbnail might look fine in a 320 px card but terrible when the CMS uses it as the zoom-modal source.
AI Image Upscaling vs Traditional Resizing
Traditional resizers (bilinear, bicubic, Lanczos) are math-first: they average or interpolate nearby pixels based on a deterministic formula. They are fast, predictable, and do not invent content. AI upscalers are statistics-first: they predict what probably should be in each new pixel, using patterns learned from huge datasets.
- Downscaling. Traditional methods stay the default; AI downscaling is rarely the bottleneck.
- Upscaling. AI usually wins perceptually, at the cost of speed, memory, and occasional hallucinations.
- Detail reconstruction. AI can plausibly restore fabric weave, skin pores, foliage, and text shapes.
- When AI helps. Product photos, portraits for internal use, thumbnails being enlarged for slides.
- When AI can produce artifacts. Small text, barcodes, maps, technical diagrams, logos, legal notices, and any content where pixel accuracy matters.
- The original remains important. AI cannot re-shoot the photo. Better the best original you can get, resize carefully, then upscale.
Resize, Prepare, and Optimize in One Browser Pipeline
PNG · JPG · JPEG · aspect-ratio lock · live preview
How RMBG.PRO Fits Into an Image Preparation Workflow
A healthy online image pipeline looks roughly like this:
Original image → edit → prepare → resize → optimize → publish
RMBG.PRO focuses on the early and middle stages of that chain. Even though the platform is best known for background removal, the capabilities below combine cleanly with a resize step:
- AI background removal isolates the subject so you can center it in a consistent product canvas before resizing.
- Custom backgrounds / color replacements let you set the final backdrop before locking dimensions.
- Watermark overlay brands the image at the correct size so you do not re-brand multiple variants later.
- Object / logo / watermark removal cleans stickers or stamps before final resize & encode.
- Batch image preparation workflows for e-commerce catalogs — covered in the bulk product editing article.
- Image resizer itself — /file-tools/image-resizer with lockable aspect ratio and pixel-level width/height controls.
If you prepare a catalog, use RMBG.PRO for the creative steps, then resize once into each final dimension before publishing.
Frequently Asked Questions
How can I resize an image without losing quality?
Start from the highest-quality original, preserve the aspect ratio, resize once to the exact target pixel dimensions, export with reasonable quality settings in an appropriate format, and compare at 100 % zoom before publishing.
Is it better to resize an image smaller or larger?
Smaller (downscale) is almost always safer: you discard pixels you already captured. Larger (upscale) forces the computer to invent pixels that never existed, so quality depends on the source and the upscaler.
Can I enlarge a low-resolution image without losing quality?
Not perfectly. The visual result can be improved, and AI upscalers often make the picture look better, but you cannot recover detail the original file never contained.
What is the best image format after resizing?
For photographs on the modern web, WebP or AVIF are usually the most efficient; use JPEG for maximum compatibility; use PNG when lossless quality or transparency is required. Match the format to the content.
Does resizing reduce image quality?
Technically, any change to pixel data changes the image. Practically, a good downscale from a large original often looks identical to the human eye at the final display size. Bad upscaling or aggressive compression can be very visible.
What is the difference between resizing and compressing?
Resizing changes pixel dimensions (width × height). Compressing changes file size (bytes) by encoding the image more efficiently, sometimes with quality loss. You can do either without the other. Best practice: resize first, then compress.
How do I resize an image for a website?
Measure the layout's largest rendered width for that asset, export one or more correctly-sized files, use responsive markup (srcset/sizes/<picture>) when possible, and pick an efficient format. Never rely on CSS alone to shrink a huge upload.
How do I resize product images for e-commerce?
Standardize on one canvas size and aspect ratio for the whole catalog, frame each subject consistently, export separate files for gallery hero / medium / thumb sizes, and keep the final encoding quality high enough that labels and textures stay readable.
Why does my resized image look blurry?
Usually one of: wrong aspect ratio, extreme upscaling, a low-quality source, too many lossy save passes, an inappropriate resample method, or aggressive JPEG compression after resize. Inspect at 100 % to find the culprit.
Can AI upscale an image?
Yes. AI upscalers can improve the perceived detail of low- resolution pictures, especially product photos and portraits. They do not guarantee perfect reconstruction, can hallucinate on text/diagrams, and work best as a helper step rather than a substitute for a high-quality source.
Conclusion
Resizing an image without losing quality, in the sense that most users mean it, is eminently achievable: start from the best original, keep aspect ratio, resize once to your exact final dimensions, export in the right format, and inspect at 100 %. The trouble usually comes from cutting corners — enlarging a tiny source, resizing the same JPEG twelve times, forgetting to lock the ratio, or uploading a 6000 px image to a 600 px slot.
For product and marketing workflows, chain the steps: clean the frame with RMBG.PRO background removal, watermark and place the subject, then resize with the image resizer before you encode and publish. If you have not yet prepared the subject, Remove Background is the classic first move.
Resize With the Right Dimensions. Publish With the Right File.
RMBG.PRO · image editing + optimization in the browser