
Compress Image Online: Reduce Image Size with WebP & AVIF
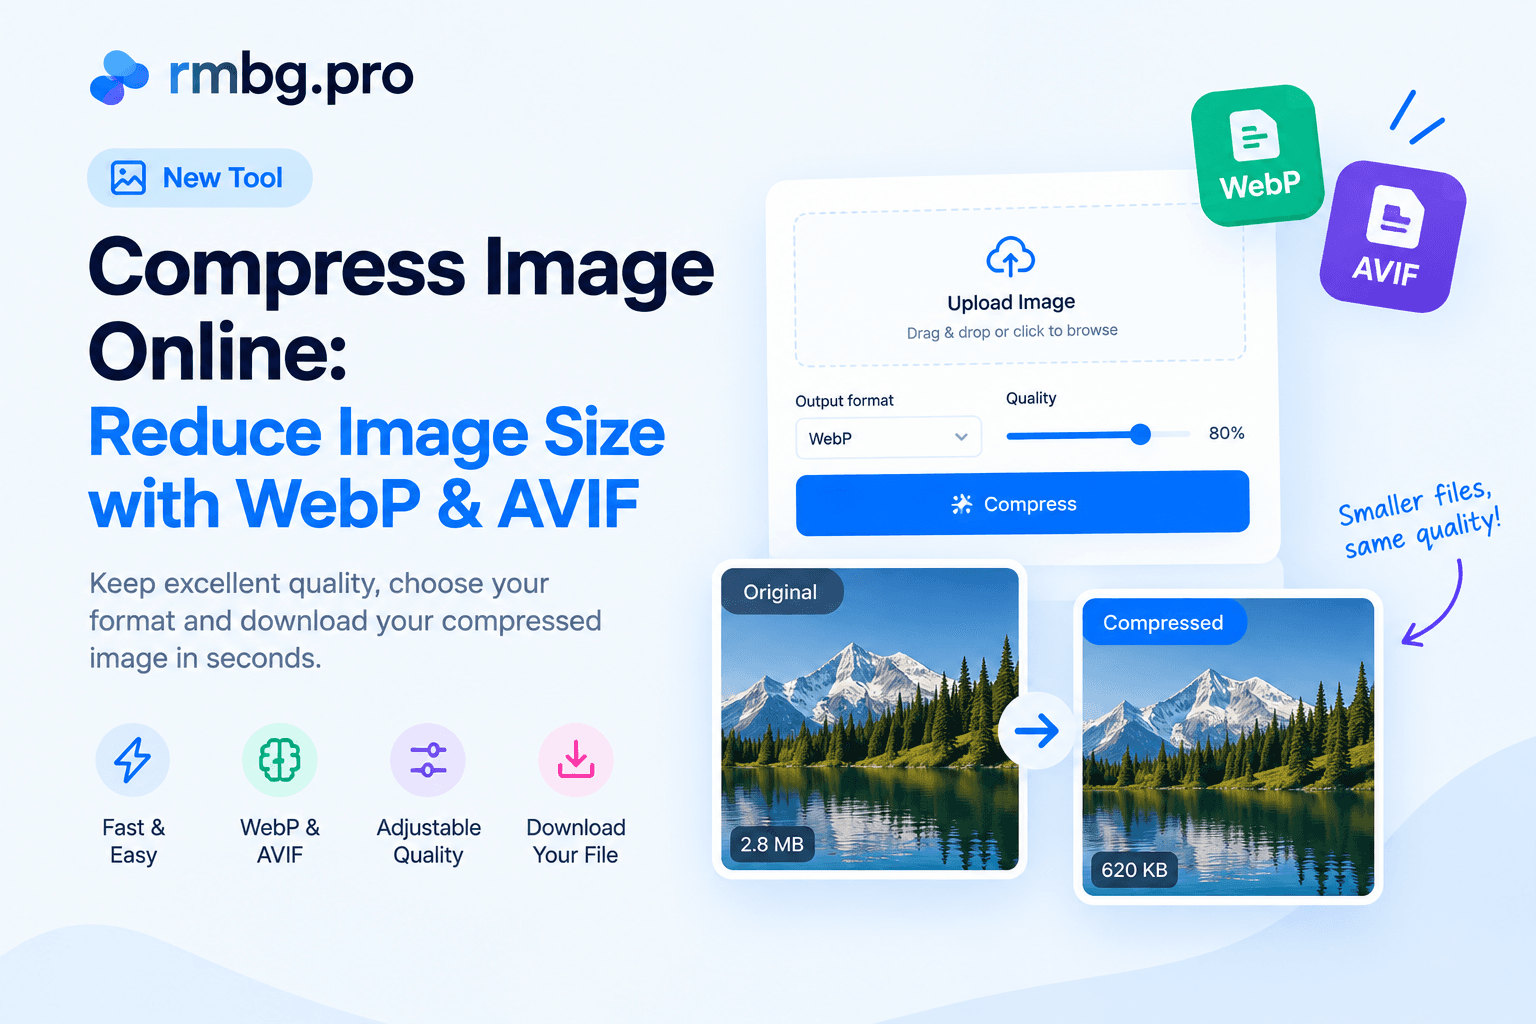
Learn how to compress images online using modern formats. Choose between WebP and AVIF, adjust the quality level, reduce file sizes, and download optimized images in seconds with the new RMBG.PRO image compressor.
Published on September 4, 2026
Image file sizes add up quickly. A single unoptimized product photo can weigh several megabytes. Send ten of them by email and your message bounces. Upload them to your website and every visitor waits longer than necessary. Attach them to a social post and the platform silently re-compresses them with visible quality loss.
Modern image formats solve most of this. WebP and AVIF produce dramatically smaller files than older formats like JPG and PNG while preserving excellent visual quality. RMBG.PRO now ships a dedicated online image compression tool that converts any uploaded image to WebP or AVIF with a fully adjustable quality slider, a live preview, and a one-click download.
In this guide we explain what image compression really does, when to use WebP or AVIF, how to pick a quality level, and exactly how to use the RMBG.PRO tool step by step.
What Is Image Compression?
Image compression is the process of encoding a picture using fewer bytes than the original file uses while preserving as much visual fidelity as possible. It is not the same as resizing, and it is not the same as converting between formats, although modern tools like RMBG.PRO combine compression with format conversion.
It is important to distinguish between the two most common types of compression:
Lossless compression
Every single pixel of the original image can be reconstructed exactly. PNG is a typical lossless format. File-size savings are usually modest, especially for photographs.
Lossy compression
Discards some information that the human eye is least likely to notice. JPG, WebP, and AVIF support lossy modes and can deliver very large file-size savings, especially at lower quality levels. This is what most people mean when they talk about “compressing a photo.”
A key distinction to keep in mind is the difference between image dimensions (width and height in pixels) and file size (the number of bytes the file takes on disk). A 4000 x 3000 image can be 15 MB or 400 KB depending on the format and quality settings, while the pixel count stays exactly the same.
Quality settings directly control how aggressive the lossy compression is. Higher quality means less compression and more bytes. Lower quality means stronger compression and a smaller file, but at very low settings artifacts can become visible: blocks, banding, color smearing, or ringing around sharp edges. That is why previewing the result before downloading matters.
Why Compress Images?
Optimized images pay dividends in almost every digital workflow. Here are the most common use cases where compression quickly becomes indispensable.
Smaller image files mean browsers download less data for each page. That helps pages become lighter, which is useful for both desktop and mobile visitors. For a broader overview of format-level gains, see our article on how WebP images can speed up your site.
Product catalogs often contain hundreds of images. Optimizing each one before uploading to a Shopify, Amazon, or WooCommerce store keeps catalog pages light and keeps the media library manageable. Pair compression with a background removal tool to build clean catalog-ready assets in one pass.
Large original files are often rejected, throttled, or silently re-compressed by social platforms. Sending a deliberately compressed WebP or AVIF file lets you control the quality and ensures a fast upload.
Most mail providers cap attachments between 10 MB and 25 MB. A handful of uncompressed photos can easily exceed that limit. Compressing each image avoids bounced messages and makes attachments download faster for the recipient.
Every megabyte saved per image multiplies across a whole library. Compressed media saves disk space, reduces cloud backup costs, and makes transfers faster when you move assets between devices.
WebP vs AVIF: Which Modern Format Should You Choose?
WebP and AVIF are both modern raster-image formats designed for the web. They are supported by the RMBG.PRO compressor as output targets, and each has distinct strengths.
WebP
- Developed by Google, widely available for well over a decade.
- Excellent compression for photos and illustrations.
- Supports lossy and lossless modes, plus alpha-channel transparency.
- Very broad browser and tool support across the modern web.
- The recommended default for general web publishing in RMBG.PRO.
AVIF
- Built on the AV1 video codec, standardized by the Alliance for Open Media.
- Often delivers very strong compression efficiency, especially at lower bit rates.
- Excellent for photographs, gradients, and complex imagery.
- Good browser support across current releases and improving steadily.
- Best choice when minimizing file size is the highest priority.

| Feature | WebP | AVIF |
|---|---|---|
| Compression | Excellent | Excellent |
| File size | Small | Often very small |
| Web usage | Excellent | Excellent |
| Compatibility | Very broad | Good and improving |
| Best for | General web use | Maximum compression efficiency |
Quality Settings Explained
The quality slider in the RMBG.PRO compressor controls how aggressively the encoder is allowed to compress the image. It is a quality/compression setting, not a change to image resolution or pixel dimensions. Your image stays the same width and height regardless of where you set the slider.

The slider ranges from 20% (strongest compression, smallest file, potential artifacts) to 100% (highest fidelity, largest file). The default in the RMBG.PRO tool is 80%, which is a balanced starting point.
100% quality
Highest visual fidelity, least compression, largest output file.
80% quality
Balanced default. Few images show visible damage at this level.
60% quality
Stronger compression, smaller files, compare the preview carefully.
40% quality
Very strong compression. Best for screenshots where tiny artifacts matter least.
The ideal setting always depends on the specific image: a flat screenshot of a UI survives lower quality better than a portrait photo with skin tones and fine gradients. Always compare the preview image before you download.
How to Compress an Image Online with RMBG.PRO
The entire workflow runs in your browser. No software to install, no account required. Here is every step, matching exactly what you see in the current Compress Image tool.
- 1
Upload your image
Open the Compress Image tool. Drag and drop a JPG, PNG, WebP, AVIF, or HEIC image onto the drop zone, or click the zone to browse your device. The file size limit is 20 MB. Compression runs locally in your browser in the current version.
- 2
Choose the output format
In the Output format menu you can pick WebP (recommended) or AVIF (smaller files). WebP is selected by default for broad compatibility. If you are publishing to a modern audience and file size is your main goal, switch to AVIF.
- 3
Choose the quality
Use the Quality slider, which ranges from 20% to 100%. The default is 80%. Drag it left for a smaller file, right for higher fidelity. The percentage is shown next to the label so you always know exactly what value will be passed to the encoder.
- 4
Click Compress
Hit the large Compress button. The tool converts your uploaded image to the selected format at the selected quality level and computes the resulting file size. Processing usually completes in well under a second for typical web images.
- 5
Review the result
The Result card shows two side-by-side previews: the Original and the Compressed image, each with its file size. Below the previews a summary reports the exact size reduction percentage. Compare the two visually and, if the result is not right, change the quality or format and compress again.
- 6
Download
When the preview looks correct, click the Download button. The file is saved with the original base name and the new extension (
.webpor.avif), ready to upload to your site or attach anywhere.
Example Workflow
A typical e-commerce workflow looks like this:
- Upload a large product photo exported straight from a camera or editor.
- Choose WebP as the output format.
- Keep the quality at the default 80%.
- Click Compress.
- Review the resulting file size and compare the compressed preview side by side with the original.
- Download the optimized image and upload it to your store.
If the photo contains fine textures or gradients and you notice any softness, increase the quality slightly and compress again. If the output is still larger than you would like, either lower the quality setting or switch to AVIF.
When Should You Use WebP?
WebP is the most conservative, compatible choice among the two modern formats. Use it in these situations:
- Images on marketing sites, blog posts, and landing pages.
- Product photos where broad browser compatibility is required.
- Blog and article illustrations, headers, and thumbnails.
- Landing page graphics that need to load quickly for every visitor.
- General online publishing where you want the largest possible reach.
For deeper advice on format choice, read our WebP performance article and the image converter guide.
When Should You Use AVIF?
AVIF is a strong option whenever squeezing bytes is the top priority and you can count on modern browsers. Typical scenarios:
- Image-heavy sites where minimizing bytes is a primary performance goal.
- Modern web stacks where you already test on recent Chrome, Edge, Firefox, and Safari.
- Content delivery pipelines tuned for performance-first image loading.
- Any environment where your team has confirmed AVIF support for the target audience.
How Much Should You Compress an Image?
These are starting points, not universal rules. The actual result always depends on the source image, its content, the format you choose, and your tolerance for minor artifacts.
| Use case | Suggested starting quality |
|---|---|
| Website photos | 70–85% |
| E-commerce images | 75–90% |
| Blog images | 70–85% |
| Social media | 70–85% |
| Maximum file-size reduction | 40–70% |
Values are starting points. Preview the output and adjust before downloading.
Compression vs Resizing
Compression and resizing are two distinct operations that both reduce file size but in different ways. Understanding the difference helps you pick the right tool for each step.
Compression
Encodes the pixel data more efficiently to cut bytes.
- Keeps image dimensions exactly the same.
- Example: 4000 x 3000 stays 4000 x 3000 pixels.
- Only the file size changes (for example, 5 MB to 900 KB).
Resizing
Changes the pixel dimensions of the image itself.
- Reduces (or increases) width and height, for example
4000 x 3000to1600 x 1200. - Also reduces file size because there are fewer pixels to store.
- Upscaling beyond the original size can introduce blur, as explained in our article on how to resize an image without losing quality.
The two techniques work beautifully together: first, when your source image is significantly larger than the space it will occupy on a page, use the Image Resizer to bring the pixel dimensions down to the display size. Then use the Compress Image tool to convert the result to WebP or AVIF at the quality you want.
Compression vs Image Conversion
Compression and format conversion are related but not identical. A pure conversion changes the file container or codec (for example, PNG to JPG) without deliberately targeting a file-size goal. Compression is the specific act of reducing how many bytes the image occupies.
The RMBG.PRO compressor combines both. When you pick WebP or AVIF, the tool converts the image to that format and applies the chosen quality level so the output is both in the new format and deliberately optimized for file size. If you ever need pure format conversion without the compression-focused workflow, the Image Converter guide covers that broader use case.
Having both tools in the same platform means you can route each image through exactly the workflow it needs.
Tips for Better Image Compression
- Start around 80% quality. It is the RMBG.PRO default and a strong balanced baseline for most images.
- Compare the result visually. Use the side-by-side preview to catch any artifacts before you download and publish.
- Use WebP for broad compatibility. It works almost everywhere on the modern web and is a sensible default choice.
- Consider AVIF when file size is especially important. AVIF often delivers a smaller file for a visually similar result.
- Avoid excessive compression when image details matter. Fine textures, skin tones, and gradients degrade earlier than flat screenshots do.
- Resize very large images when their dimensions are unnecessarily large. For example, a 6000-pixel-wide camera export rarely needs that width inside a blog post. Resize first, then compress.
- Keep original files. Once you save a compressed lossy file, the discarded information is gone. Keep the master photo or raw export so you can re-export at higher quality later if you need to.
RMBG.PRO Compress Image Tool
The new Compress Image tool on RMBG.PRO bundles everything we just covered into a single clean interface:
- Browser-based online image compression with drag-and-drop upload.
- Two modern output formats: WebP and AVIF.
- Fine-grained adjustable quality slider from 20% to 100%, defaulting to 80%.
- Side-by-side original and compressed previews with real file-size numbers.
- Visible size-reduction percentage after compression.
- One-click Download for the final optimized file.
- Simple, linear workflow from upload to result with no signup or software installation.
RMBG.PRO also ships a full suite of AI and file tools around the compressor: background removal, object removal, watermark handling, image resizing, format conversion, OCR, PDF utilities, and more.
Ready to Reduce Your Image File Sizes?
Open the RMBG.PRO Compress Image tool right now. Upload a file, pick WebP or AVIF, adjust the quality, and download your optimized image in seconds.
Compress Image OnlineImportant: Respect image ownership and copyright. Only compress and publish images you own or have explicit permission to optimize and redistribute. Avoid re-encoding copyrighted photos, logos, or branded assets that you do not control.
Reduce image file size (KB and MB) — what actually works
To reduce the file size of an image, two levers matter: quality and pixel dimensions. Quality decides how much detail the encoder may discard, dimensions how many pixels are stored at all. Lowering quality moves the number fastest; resizing helps most when the original is far larger than it needs to be on screen.
KB and MB are units of the same measurement — 1 MB is 1,024 KB. Compress in the Compress Image tool and it reports the exact before-and-after figures, so you can check the target you care about.
| What you want | First lever | Sensible starting range |
|---|---|---|
| MB down to KB | Resize, then compress | Display width, then 70–85% |
| Trim a few hundred KB | Quality only | 70–85% |
| Smallest acceptable file | Format plus lower quality | AVIF, 40–70% |
| Preserve fine detail | Leave the dimensions alone | 85–100%, larger file |
These are starting ranges, not guarantees. The outcome always depends on the source image.
Order matters. If the image needs fewer pixels, run it through the Image Resizer first, then compress. If the format is the limiting factor, start with the Image Converter. For format trade-offs, see our WebP guide.
Frequently Asked Questions
How do I compress an image online?▾
Open the RMBG.PRO Compress Image tool, drag and drop your image onto the upload area, select WebP or AVIF as the output format, adjust the quality slider (the default is 80%), and click Compress. When processing finishes, you can preview the result and download the compressed file.
What is the best quality setting for image compression?▾
The best setting depends on the image and its use case. As a starting point, use 80% quality (the RMBG.PRO default) for a strong balance between visual quality and file size. For websites and blogs, 70% to 85% usually works well. For e-commerce product photos, 75% to 90% is a sensible range. Always compare the result visually before downloading.
Is WebP better than JPG?▾
For web usage, WebP typically produces smaller files than JPG at a comparable visual quality level, and it also supports transparency. Browser support for WebP is very broad across modern browsers. JPG still has the widest compatibility across legacy software. In most web publishing scenarios, WebP is a better choice than JPG.
Is AVIF better than WebP?▾
AVIF can often achieve stronger compression than WebP, meaning a smaller file size for a similar visual result. Browser support for AVIF is good and improving, but it is still worth verifying compatibility for your audience. Use WebP for maximum compatibility and AVIF when minimizing file size is a priority.
Does compressing an image reduce its dimensions?▾
No. Compression in the RMBG.PRO tool reduces the file size while keeping the image dimensions (width and height in pixels) exactly the same. If you also need to change the pixel dimensions, use the Image Resizer tool before or after compression.
What is the difference between image compression and resizing?▾
Compression reduces the file size by encoding the image data more efficiently. It preserves the pixel dimensions. Resizing changes the pixel dimensions (for example, 4000 x 3000 to 1600 x 1200), which also reduces file size. Both techniques can be combined for maximum optimization.
Can I compress an image without losing much quality?▾
Yes, especially when switching from a legacy format like JPG to a modern format like WebP or AVIF. With the RMBG.PRO default of 80% quality, most images retain excellent visual fidelity while delivering a noticeably smaller file. For critical photos, compare the preview visually before downloading.
What quality should I use for WebP?▾
For WebP, start with 70% to 85% quality depending on the image. The RMBG.PRO default of 80% is an excellent general-purpose setting. E-commerce and photography-heavy pages can lean toward 80% to 90%, while simple screenshots and diagrams can go as low as 60% to 75% without obvious quality loss.
What quality should I use for AVIF?▾
For AVIF, similar quality ranges apply: 70% to 85% is a strong starting point. Because AVIF compression is very efficient, you may find that a slightly lower quality than WebP still looks excellent while producing a smaller file. Always verify the visual result in the preview before downloading.
How do I reduce the file size of an image?▾
Two levers move the number: quality and pixel dimensions. Lowering quality lets the encoder discard more detail while the pixel dimensions stay the same. Reducing dimensions stores fewer pixels, which cuts the file further but limits how large the image can be shown. Quality alone often trims a few hundred kilobytes; resize when the image is far bigger than it needs to be on screen.
Is it better to lower quality or resolution?▾
They change different things. Lowering quality keeps the full pixel count and reduces bytes by discarding detail, which is the gentler option for a photo that is already sized correctly. Lowering resolution stores fewer pixels and cuts the file more aggressively, but the image can no longer be displayed as large. A sensible order is to resize first, then compress at a moderate quality.
Can I compress several images at once?▾
The Compress Image tool works on one image per run: upload a file, choose the format and quality, compress, then download. For a set of images, repeat the same settings for each file so the results stay consistent. If some files are much larger than they need to be, resize those first and then compress them.
Similar articles
View all
Work with permitted TikTok content using RMBG.PRO. Check public TikTok links, convert videos to MP4 or WebM, extract MP3 or WAV audio, and choose quality presets.
Travaillez avec du contenu TikTok autorisé grâce à RMBG.PRO. Vérifiez les liens publics, convertissez en MP4 ou WebM, extrayez l’audio MP3 ou WAV et choisissez la qualité.
Trabaja con contenido TikTok permitido en RMBG.PRO. Revisa enlaces públicos, convierte a MP4 o WebM, extrae audio MP3 o WAV y elige la calidad.